Outdoor log inoculation: shiitake, oyster, lion's mane
Prices and availability checked . Canadian retail moves and suppliers change — verify before buying.
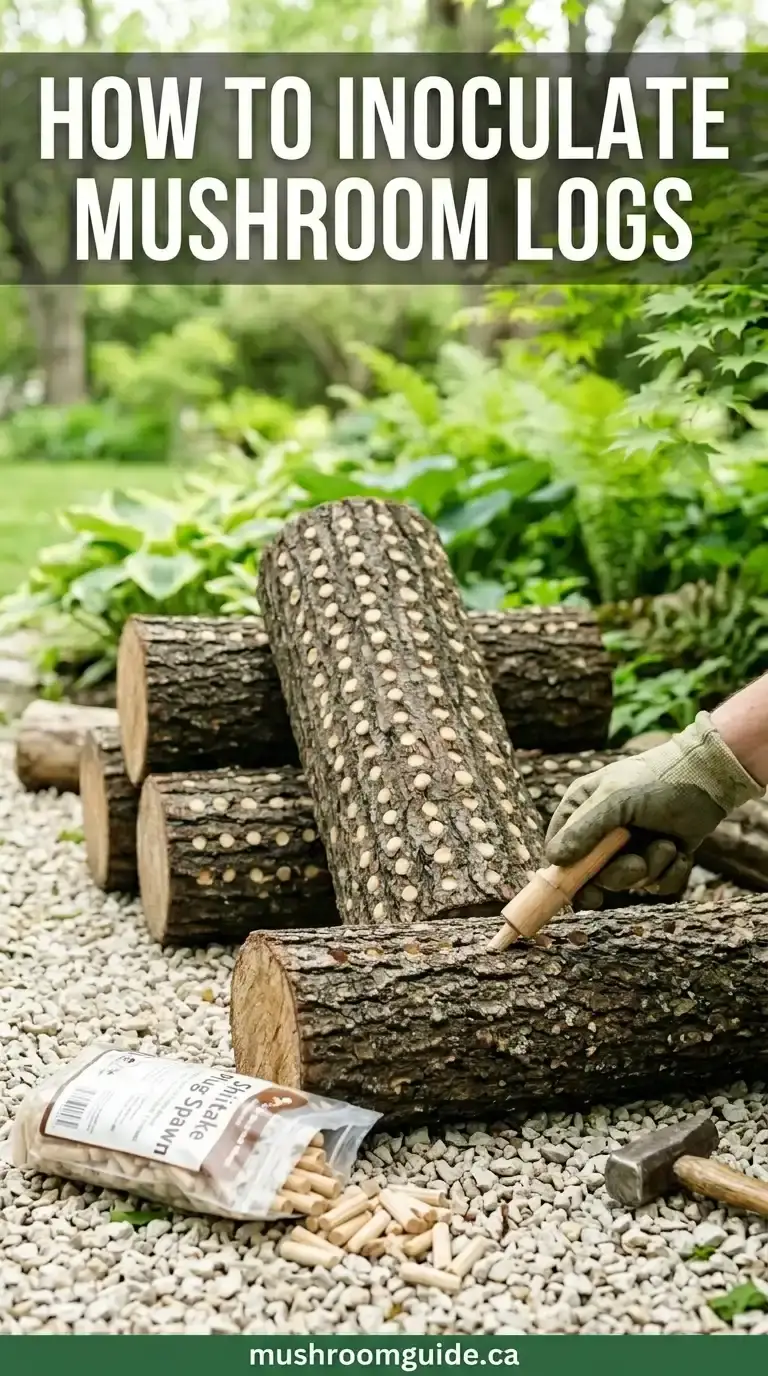
Outdoor log inoculation is the lowest-effort, longest-running mushroom cultivation method available to Canadian home growers. Drill holes, hammer in spawn plugs, wax over, then walk away for a year. The logs fruit naturally with the weather, year after year, for 4–6 years per log.
The trade-off: it’s slow. You inoculate this spring, you get your first harvest next year. If you want mushrooms now, grow in buckets or bags. If you want a self-renewing patch in the yard, this is the method.
TL;DR
- Best time to cut logs: late winter to early spring (March–April in most of Canada), before bud break
- Inoculate within 2–4 weeks of cutting — fresh logs only
- Best species for Canadian climate: shiitake (most common), oyster, and lion’s mane
- Method: drill holes → hammer in plug spawn → seal with food-safe wax
- First harvest: 12–18 months after inoculation, varying by species and climate
- Productive life: 4–6 years per log
- Yield: ~0.5–1 lb fresh mushrooms per log per year, once established
When to cut your logs
The single most important variable. Wood needs to be:
- Freshly cut (within 2–4 weeks of inoculation)
- From a living tree (not deadfall — competing fungi have already colonized)
- Cut while the tree is dormant, before sap rises and bud break begins
For most of Canada, that means mid-March to mid-April. A few weeks earlier on the BC south coast; a few weeks later in the Prairies and northern Canada.
If you cut a log in summer, the tree’s natural fungal defenses are high and bark beetles + airborne mold spores will compete with your spawn. You’ll get poor colonization.
What wood to use
| Wood | Shiitake | Oyster | Lion’s mane | Notes |
|---|---|---|---|---|
| Sugar maple | ✅ | ✅ | ✅ | Best all-around |
| Red oak | ✅ Excellent | ✅ | ✅ | Top choice for shiitake |
| White oak | ✅ Excellent | ✅ | ✅ | Slow but very long-lived |
| Beech | ✅ | ✅ | ✅ Excellent | Top choice for lion’s mane |
| Birch | ⚠️ | ✅ | ✅ | Lower yield, shorter life |
| Poplar / aspen | ❌ | ✅ Excellent | ⚠️ | Best for oyster mushrooms |
| Alder | ❌ | ✅ | ⚠️ | Like poplar |
| Cherry | ⚠️ | ✅ | ✅ | Decent |
| Cedar, pine, fir | ❌ Never | ❌ Never | ❌ Never | Conifer resins prevent colonization |
| Walnut | ❌ | ❌ | ❌ | Juglone is anti-fungal |
The rule of thumb: dense hardwood for shiitake and lion’s mane; softer hardwood (poplar, alder, birch) for oyster.
Log dimensions
- Diameter: 10–20 cm (4–8 inches)
- Length: 90–120 cm (3–4 feet)
- Weight: manageable — you’ll be moving these around your yard
Smaller-diameter logs (under 7 cm) dry out too fast. Larger-diameter logs (over 25 cm) take longer to fully colonize and are awkward to handle.
Materials
For 6 logs (a good first-time batch):
- Fresh hardwood logs cut to size
- One bag of plug spawn (~100 plugs) for your chosen species — Sporeworx (Toronto), MycoSupply (BC), or North Spore (US) all sell this
- A drill with a 5/16″ or 8 mm bit (matches plug diameter)
- A small mallet or hammer
- Cheese wax or beeswax (food-safe wax — don’t use crayons or candles)
- A small old paintbrush or sponge dauber for waxing
- A double boiler or old tin can in a pot of water for melting wax
Total cost for 6 logs: ~$60–80 CAD including the spawn.
The method (one afternoon’s work)
Step 1: Drill the holes
Standard pattern: a diamond grid of holes around the log.
- Drill holes 2.5 cm (1 inch) deep — slightly deeper than the plug length
- Space holes 10 cm (4 inches) apart along the length
- Offset each row of holes by 5 cm (rotating the pattern around the log)
- Use about 30–50 plugs per log depending on log size
For shiitake, slightly denser pattern; for oyster, sparser is fine.
Step 2: Hammer in plug spawn
- Open your bag of plug spawn (wear an N95 — fresh spawn releases spores).
- Place a plug at the mouth of each hole.
- Tap with the mallet until the plug is flush with the bark surface.
- Plug should fit snugly — if it falls in, the hole is too deep or the drill bit was too big.
Step 3: Wax over
This is non-negotiable. The wax seals the hole against:
- Moisture loss (the spawn needs to stay damp to colonize)
- Competing fungi (any open hole is a doorway)
- Insects (especially carpenter ants, who will tunnel into open holes)
- Melt the cheese wax in a double boiler. Don’t overheat — wax above 90 °C can scorch.
- Daub a small amount of wax over each plug. You want a thin coating that fully covers the hole, not a thick blob.
- Also wax any visible damage on the log bark or the cut ends if they’re cracked.
Step 4: Stack and wait
Stack the logs in a shaded, sheltered area. The classic “crib stack” alternates logs in perpendicular layers — keeps them ventilated and easy to inspect.
Where to put them:
- North side of a building or under a deck: ideal
- Under a deciduous tree that provides summer shade: also good
- Direct sun: bad — logs dry out and the spawn won’t colonize
Some growers cover the stack loosely with a tarp for the first 6 months to maintain moisture. Optional.
What happens in the next 12 months
Months 1–3: spawn begins colonizing the wood from each plug outward. Nothing visible from the outside.
Months 3–9: colonization spreads through the log. By month 9, white mycelium may be visible at the cut ends of the logs.
Months 9–12: the log is fully colonized. The bark may start to loosen slightly. This is normal.
Months 12–18: the first natural fruiting flush. Triggered by a combination of:
- Rainfall (or you can “shock” the log by soaking it overnight)
- Temperature swings of 5–10 °C from day to night
- Seasonal change (most species fruit best in spring or fall)
Forcing a first fruiting (the soak method)
If natural fruiting hasn’t happened by month 14–16, you can force it:
- Submerge the entire log in cold water for 24 hours. A child’s wading pool, a rain barrel, or a deep utility sink work.
- Drain, return to the stack.
- Mist the log daily for the next 7 days.
- Pins typically appear within 5–10 days.
The cold-water soak simulates a heavy rain. After the first forced flush, subsequent flushes usually happen naturally with weather.
Canadian regional notes
BC south coast (Vancouver, Victoria, lower Fraser Valley)
Ideal climate. Mild winters and a long shoulder-season mean logs fruit naturally without forcing. Multiple flushes per year are common. Inoculate March–April.
Prairies (Saskatoon, Calgary, Winnipeg)
Cold winters mean logs go dormant for 4–5 months. Fruiting season is short (spring + fall flushes). Drier climate means you’ll need to soak logs more often. Inoculate April.
Ontario / Quebec (Toronto, Ottawa, Montreal)
The textbook Canadian climate for log cultivation. Most published guides come from this latitude. Inoculate late March to mid-April. Expect strong spring + fall flushes; logs go dormant in deep winter and high summer.
Atlantic Canada (Halifax, Moncton, St. John’s)
High humidity is your friend. Inoculate April. Watch for excessive moisture in extended wet stretches — too wet attracts contamination.
Far north (Whitehorse, Yellowknife, Iqaluit)
Possible but not easy. Long cold dormancy + short fruiting window. Use the fastest species (oyster on poplar) for best results. Inoculate May, once daytime temps consistently exceed 5 °C.
Yield expectations
A productive log produces:
- Shiitake: 0.5–1 lb fresh per year for 4–5 years (2.5–5 lb total)
- Oyster: 1–2 lb fresh per year for 3–4 years (3–8 lb total)
- Lion’s mane: 0.5–1 lb fresh per year for 3–4 years (1.5–4 lb total)
Use our yield estimator for substrate-based yield math. Log cultivation is a separate calculation — actual yield depends heavily on rainfall, sun exposure, and log species.
After 4–6 years
Logs become spent — colonization runs out of carbohydrates to convert. You’ll see fewer flushes year over year, then nothing. At that point:
- Compost the spent logs — they’re soft, rotted, mycelium-rich organic matter that’s excellent for garden beds
- Or break them up and use them as carbon-rich “browns” in a household compost pile
Inoculate fresh logs each spring to keep a rotation going.
What you don’t need to do
- Don’t fertilize the logs. They feed on the wood. Adding fertilizer accelerates competing mold.
- Don’t water on a schedule. Mist when dry; otherwise leave alone.
- Don’t move the logs to “force” fruiting with temperature changes — that’s a sterilized-bag-cultivation technique. Outdoor logs respond to weather.
- Don’t worry about pests. Slugs occasionally eat oyster mushrooms on logs; that’s normal. Set out a beer trap if it becomes a problem.
Spore safety reminder
Wear an N95 mask when handling plug spawn (fresh spawn is dusty), during the inoculation process, and when harvesting from established logs — especially heavy-sporulating oyster species. Repeated unmasked spore exposure can cause hypersensitivity pneumonitis (“mushroom worker’s lung”).
Related guides: How to grow oyster mushrooms in Canada — the indoor bucket method for faster harvests. How to grow shiitake mushrooms in Canada — shiitake is the textbook log species; this guide explains the bag-method alternative for indoor production. How to grow lion’s mane mushrooms in Canada — lion’s mane fruits well on beech logs. Common mushroom contamination — what to watch for on the log surface. Yield estimator — for indoor block grows; log yields follow a different curve. Substrate calculator — for indoor grows; log cultivation uses the wood itself as substrate.
Safety & data: Mushroom worker’s lung: N95 spore-safety guide — the spore safety every grower needs. Mushroom growing conditions chart — temperature, humidity & timing for every species.